|
|
|
|
Depending on the Servlet Engine you are using, the actual upgrade process may differ -- this page focuses on Tomcat users.
The topics covered on this page include:
Log in to the Tomcat Manager (Usually http://machine:8080/manager/html)
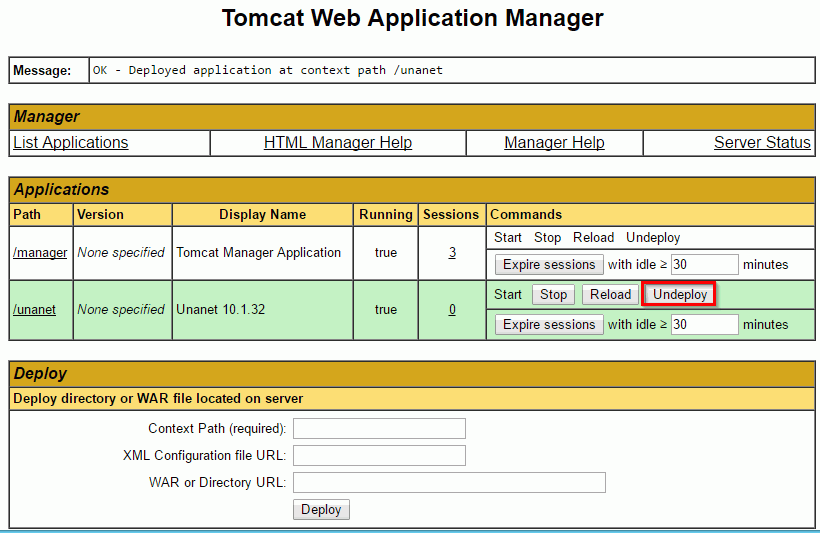
In the list of applications, find your Unanet application and click on the "Undeploy" link under Commands. See the following screen shot for more info.
Tomcat Undeploy Issue -- If the unanet application still exists after undeploying and refreshing the browser you will need to take additional manual steps. Occasionally, when undeploying the unanet.war file in Tomcat, two directories and a file associated with it do not remove themselves properly. Should this occur, the best way to resolve the issue is by stopping the Tomcat service (as a Windows service if running the Windows platform), then removing the file and directories that did not undeploy.
Path examples of the file and directories that need to be removed are shown below:
Example:
Directories to delete (unanet directory only):
\\tomcat\webapps\unanet
\\tomcat\work\Catalina\localhost\unanet
File to delete:
\\tomcat\conf\Catalina\localhost\unanet.xml
Once these items are removed, restart the Tomcat service, refresh Tomcat Manager in your browser to verify the Unanet application has fully undeployed (no longer exists as an application in the Tomcat Manager). Then, again follow the deployment directions entering the proper information in the 'Deploy directory or WAR file located on server' fields.

Now you will need to re-deploy the Unanet application in exactly the same way as you did when you first installed Unanet.
Start the Tomcat process or service corresponding to your instance of Unanet. In the Deploy section, you will need to fill out the "Deploy directory or WAR file located on server" section. Please note that you must be located on the same machine that Unanet was installed on (and that Tomcat is on). Below is a screen shot of the page along with the values you need to use for a standard installation. Keep in mind that if you are using a non-standard context-path or unanet install location, you will need to change those values accordingly.

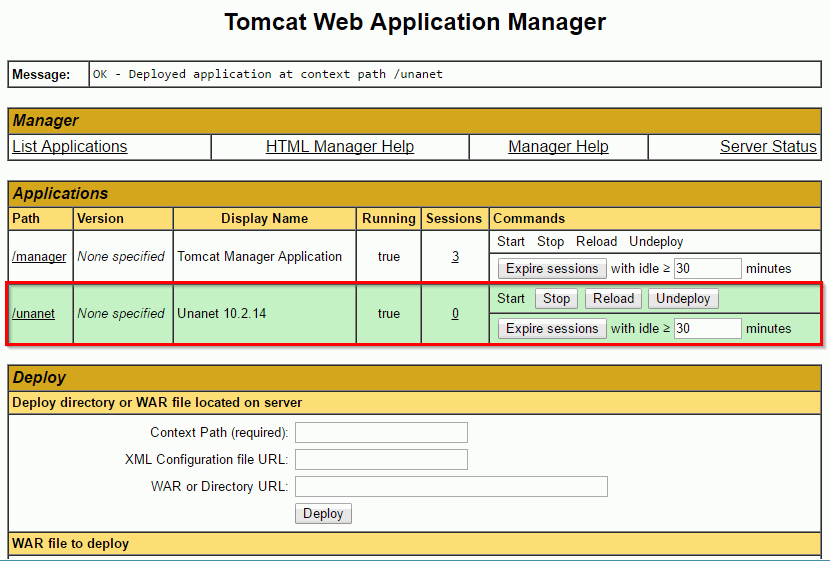
Once you have filled out the three fields, click the Deploy button. Depending on the speed of your system, this process may take several minutes. When it is done, the screen should refresh and you will see the appropriate message in the Message section along with the Unanet application listed in the Applications section (see screen shot below).

If you are experiencing difficulties contact Unanet Customer Support for assistance.
The next step is to verify that your Unanet System has been successfully updated.